LAMP MAKEOVER

Shaking the LIGHT back in!
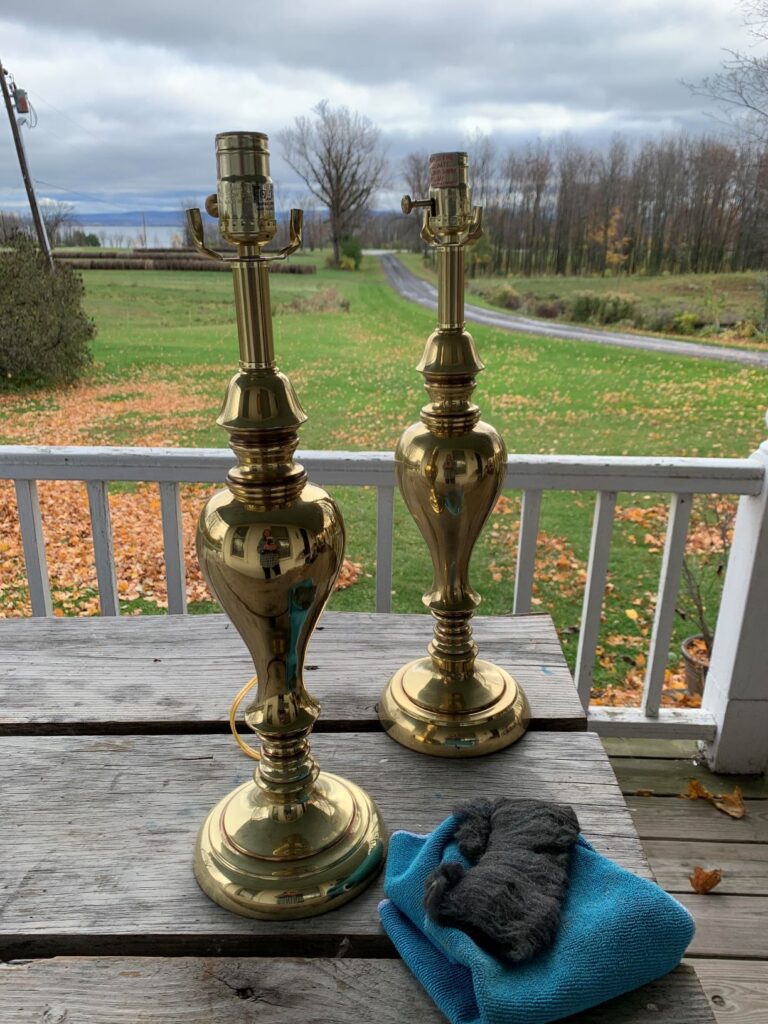
While cleaning out my attic a few weeks ago in preparation for a yard sale I had been planning for about three years, I stumbled upon these two glistening towers of brass. I only vaguely recall these being passed on to me by my dear aunt who was cleaning out her neighbors home (the neighbor was moving into assisted living). With one quick glance at them, I knew for sure that they could easily be updated with a little paint and some new lamp shades. Here is how the transformation took place.
STEP ONE: PREP!
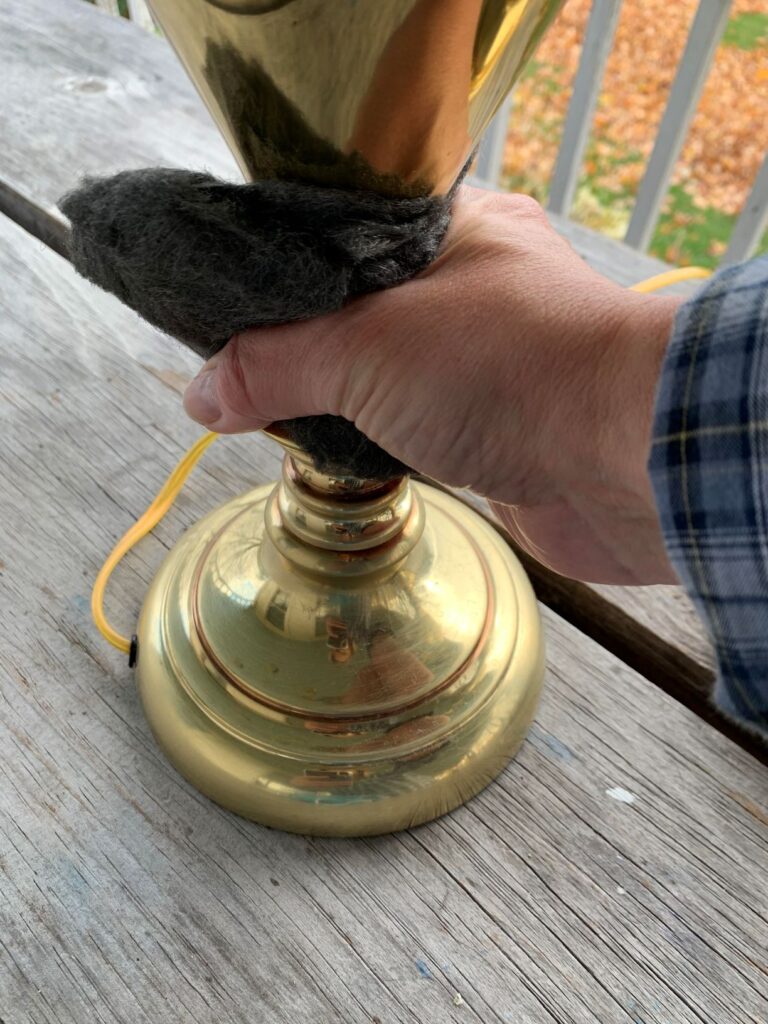
First I used some steel wool to scuff up the surface a bit to help the paint adhere to the metal. This extra step really helps to increase the adhesion of the paint, and will hopefully reduce scuffing or scrapes down the road.

Then I found some scrap paper to cover up the socket – just to make sure paint doesn’t end up where it shouldn’t be. (*Due to cold windy weather – I am painting inside the house that we will be demoing, with open windows as ventilation. I’ve been using the old house as my own personal painting booth until it becomes rubble. However, I highly recommend always using spray paint outside when possible.)
STEP TWO: PAINT!

I used KRYLON Fusion All-In-One Paint+Primer in Satin Black. The paint in this picture looks super glossy – but that is just while it is wet. In the end, I got a nice satin black finish that resembles a wrought iron lamp base. I sprayed several light coats on the lamp bases until I was absolutely certain every last inch was covered, then I let them dry in place for 48 hours – just so that the paint would be cured really well.
STEP THREE: FINISH!

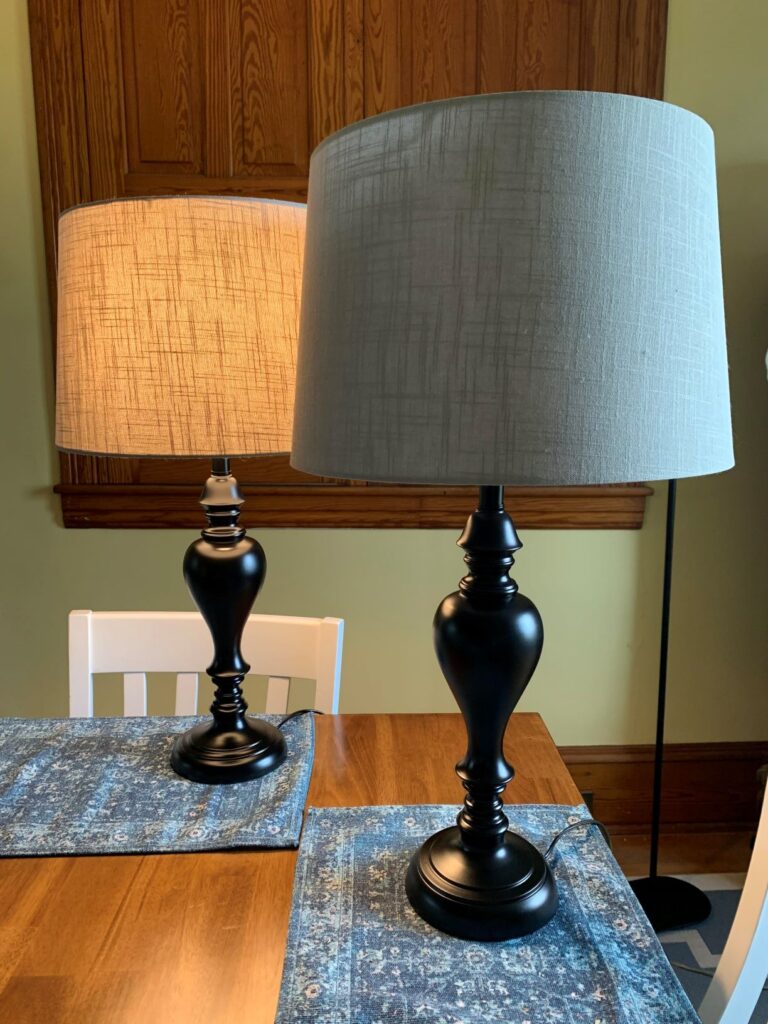
I found these gray linen lamp shades at Lowes for about $24 each which look fantastic with the painted black lamp bases! I am so thrilled with the end result of these free-to-me old brass lamps! I cannot wait to see them in the new house!